Rolling chassis! Joy! Joy!
I haven't made any posts to the blog in the last week because I've been intent on getting the wheels on the ground. The weekend before I set out a pretty aggressive list of things to do to achieve a rolling chassis. I got held up at pressing in the new u-joints in the half shafts. I found that the new snap rings just didn't want to seat very well and figured it was a result of the rust and crud build up in the snap ring groves of the shaft ends. So, Monday I purchased a Black and Decker "Dremel" like tool and used the cutting disk to clean out the snap ring grooves. With that done, the snap rings popped right in place and all was good.
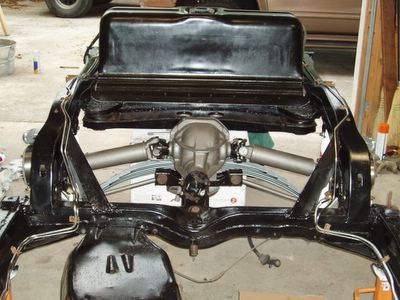
Next, torqued down the shafts to the t-arm spindles on the back. Mounted the t-arms to the frame with the hardware from Bairs and loose fitted them, no shimming yet. Next, connect up the strut rods to the bracket under the diff. And here's where I encountered my second snag, the shock brackets didn't want to drive all the way into the spindle ears no matter how much torquing down I did. The grooved knuckle on the inside edge of the bracket was too big to seat into the ears on the spindle. Whipped out the Dremel and sanded them down a little and did a little clean sanding on the inside of the ears since the spindle was litely painted at Van Steel. Popped them back in and then they torqued down just fine. Popped in the shafts into the diff ends and torqued down the u-joint brackets. Hook up the shocks and it's coming along.
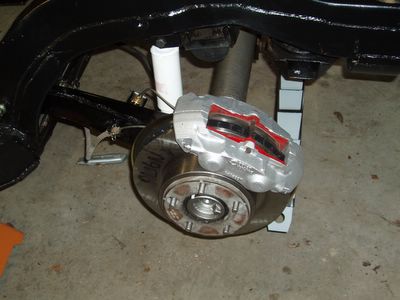
I then focused on the brake calipers. The back ones were in decent shape, a little rusted but not too nasty. I think these are the ones that Jim or Travis had replaced a couple years back. The front ones were pretty rough looking. I cleaned them all up and then inspected the caliper seals, etc. The back were in good shape, no leaks, cracks, nothing. The front weren't as lucky. The seals around the SS inserts were cracked and leaking and were extremely spongey indicating the springs were gone. Goodie, so I have to replace a couple of front calipers. Did some checking and as luck would actually have it, I found the local Autozone had rebuilt Delco calipers for $61 a piece with core exchange. This beat Corvette Central by about $28 per caliper.....real money! Finished up the prep and paint of the calipers with the VHT high heat silver and they look pretty good don't ya think?
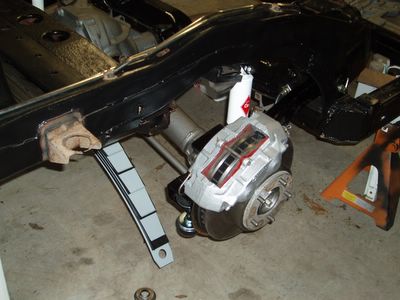
Left rear t-arm, caliper, shock all put together. Looks good!
Right rear.
Of course the brake lines are all new as well. The old ones were in pretty rough shape, rusty!
Saturday arrives and there's still a lot to do to get 4 wheels on the ground! Did some easy things first: put new SS alignment shims in the front matching the originals, greased up all the joints, and put in the cotter pins. Good! Now put the wheels back on. In a couple of the pictures you may notice the rear spring is on but no connected yet. I found that the weight of the car was too light to jack up the spring and compress enough to get it on the bolt. So I thought the wheel weight might be enough to do it. Wrong! The father-in-law came up with a good idea, put a beam from the frame up to the ceiling joist in the garage. What a great idea! I'm just embarassed that me, the engineer, didn't think of it. Hooked up the spring about 15 minutes later on both ends!
Here's the remaining pictures of the efforts and the reward: a rolling chassis. I've included a couple of before pictures to show the contrast.
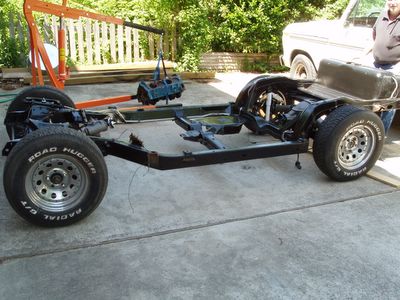
A beautiful Spring day and a rolling chassis! What a good day!

This is the same thing BEFORE the restoration. Loads of work but worth it I do believe.
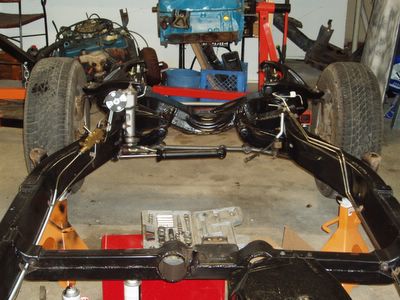
View of the front, all put together
View of the back all assembled
Next, torqued down the shafts to the t-arm spindles on the back. Mounted the t-arms to the frame with the hardware from Bairs and loose fitted them, no shimming yet. Next, connect up the strut rods to the bracket under the diff. And here's where I encountered my second snag, the shock brackets didn't want to drive all the way into the spindle ears no matter how much torquing down I did. The grooved knuckle on the inside edge of the bracket was too big to seat into the ears on the spindle. Whipped out the Dremel and sanded them down a little and did a little clean sanding on the inside of the ears since the spindle was litely painted at Van Steel. Popped them back in and then they torqued down just fine. Popped in the shafts into the diff ends and torqued down the u-joint brackets. Hook up the shocks and it's coming along.
I then focused on the brake calipers. The back ones were in decent shape, a little rusted but not too nasty. I think these are the ones that Jim or Travis had replaced a couple years back. The front ones were pretty rough looking. I cleaned them all up and then inspected the caliper seals, etc. The back were in good shape, no leaks, cracks, nothing. The front weren't as lucky. The seals around the SS inserts were cracked and leaking and were extremely spongey indicating the springs were gone. Goodie, so I have to replace a couple of front calipers. Did some checking and as luck would actually have it, I found the local Autozone had rebuilt Delco calipers for $61 a piece with core exchange. This beat Corvette Central by about $28 per caliper.....real money! Finished up the prep and paint of the calipers with the VHT high heat silver and they look pretty good don't ya think?

Left rear t-arm, caliper, shock all put together. Looks good!

Right rear.
Of course the brake lines are all new as well. The old ones were in pretty rough shape, rusty!
Saturday arrives and there's still a lot to do to get 4 wheels on the ground! Did some easy things first: put new SS alignment shims in the front matching the originals, greased up all the joints, and put in the cotter pins. Good! Now put the wheels back on. In a couple of the pictures you may notice the rear spring is on but no connected yet. I found that the weight of the car was too light to jack up the spring and compress enough to get it on the bolt. So I thought the wheel weight might be enough to do it. Wrong! The father-in-law came up with a good idea, put a beam from the frame up to the ceiling joist in the garage. What a great idea! I'm just embarassed that me, the engineer, didn't think of it. Hooked up the spring about 15 minutes later on both ends!
Here's the remaining pictures of the efforts and the reward: a rolling chassis. I've included a couple of before pictures to show the contrast.

A beautiful Spring day and a rolling chassis! What a good day!
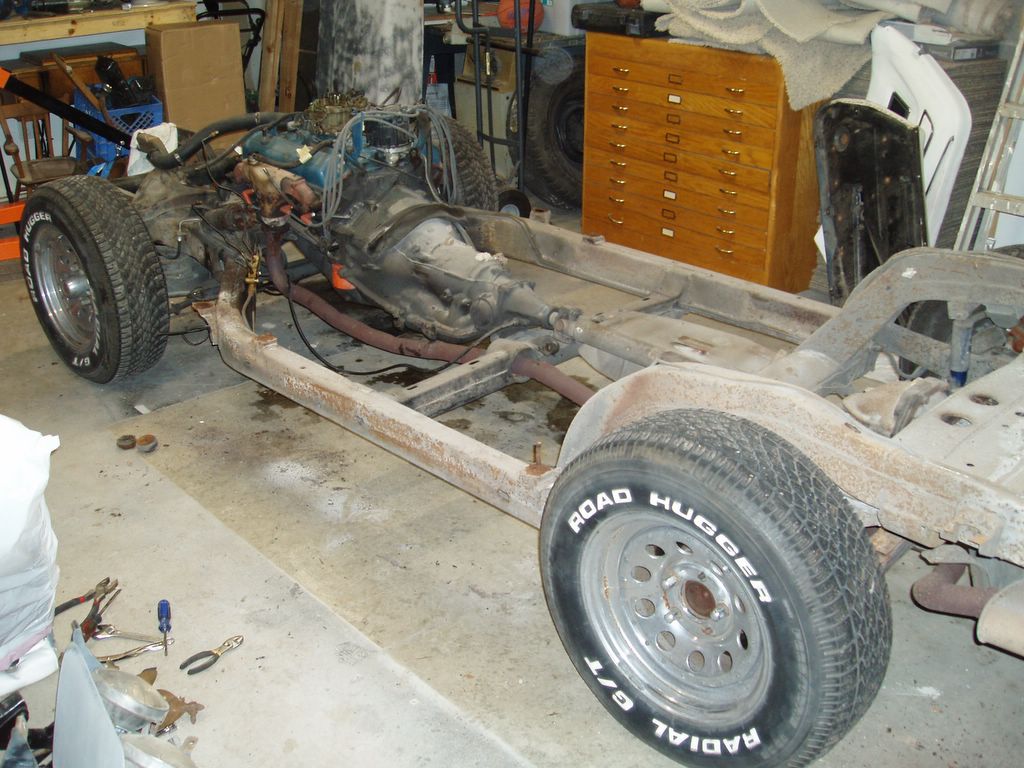
This is the same thing BEFORE the restoration. Loads of work but worth it I do believe.

View of the front, all put together

View of the back all assembled
posted by Steve at 1:02 PM
![]()

0 Comments:
Post a Comment
<< Home