Color and clear done!
After doing the final wet sand, it's necessary to re-tape the body again to make sure none of the primer in the old paper releases into the paint. Then shoot the color, which is PPG Deltron base coat mixed to the original color of the car: silver/blue metallic. The color goes down in a fashion called dry. It's called this because it's better to have more layers of light coats than thick wet coats. If you get a run in the color, you've got serious trouble. Take it SLOOOOWWWWW at this point.
I laid down 4 layers in total which took about 3 hours to do very carefully. The first 3 layers were put down in a horizontal pattern and the final coat in the vertical to cover up an effect called tiger striping. I also found the lighting in my garage stinks especially in under areas around the rear window cowl and the edges along the bottom of the panels. I grabbed a flash light and used that to peer under these areas and then shoot to make sure I got good coverage. Good thing I did too since I could see very clearly that I was not getting good coverage in these areas after the 2nd coat.
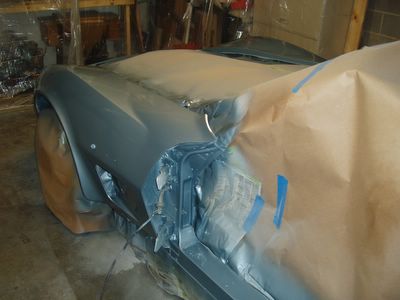
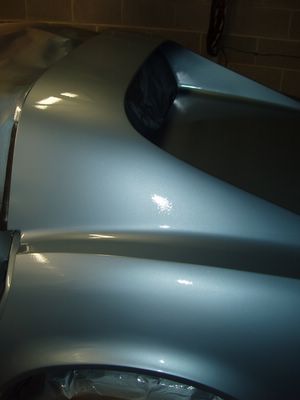
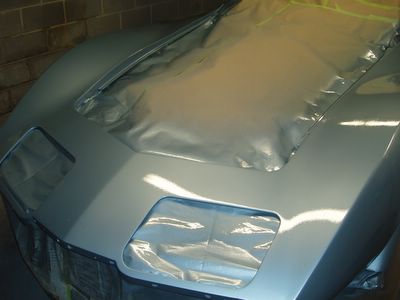
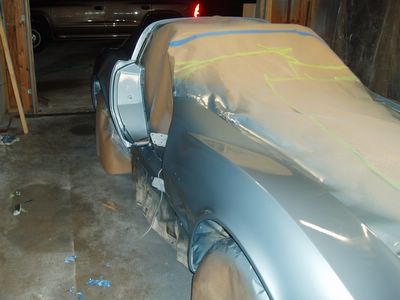
Final stage comes the clear coat. For this I used PPG Concept 2021 urethane. The clear needs to be put down VERY soon after the color to avoid oxidation and discoloration of the color. The first layer of clear I put down with my HVLP gun, the same one that I shot the color with (I used a siphon gun for the primer layers). It did fine for a light tack coat of clear but had some issue shooting it when I went slightly vertical to get under the fenders. The viscosity of the clear is quite thick and I think that my cheapy HVLP gun from Harbor Freight couldn't handle it. So, I switched to the siphon gun and then laid down 2 wet layers of clear. This is what it looks when complete. Still left to do is the color sanding and cut and finish compounding steps. But this looks simply awesome and really sparkles in the light!

After final color and clear, rear deck

Final color and clear, drivers side

Final color and clear, drivers rear fender

Final color and clear, front

Final color and clear, passengers side
I laid down 4 layers in total which took about 3 hours to do very carefully. The first 3 layers were put down in a horizontal pattern and the final coat in the vertical to cover up an effect called tiger striping. I also found the lighting in my garage stinks especially in under areas around the rear window cowl and the edges along the bottom of the panels. I grabbed a flash light and used that to peer under these areas and then shoot to make sure I got good coverage. Good thing I did too since I could see very clearly that I was not getting good coverage in these areas after the 2nd coat.
Final stage comes the clear coat. For this I used PPG Concept 2021 urethane. The clear needs to be put down VERY soon after the color to avoid oxidation and discoloration of the color. The first layer of clear I put down with my HVLP gun, the same one that I shot the color with (I used a siphon gun for the primer layers). It did fine for a light tack coat of clear but had some issue shooting it when I went slightly vertical to get under the fenders. The viscosity of the clear is quite thick and I think that my cheapy HVLP gun from Harbor Freight couldn't handle it. So, I switched to the siphon gun and then laid down 2 wet layers of clear. This is what it looks when complete. Still left to do is the color sanding and cut and finish compounding steps. But this looks simply awesome and really sparkles in the light!

After final color and clear, rear deck


Final color and clear, drivers side


Final color and clear, drivers rear fender


Final color and clear, front


Final color and clear, passengers side


0 Comments:
Post a Comment
<< Home