Saturday, January 07, 2006
Monday, October 03, 2005
Color and clear done!
After doing the final wet sand, it's necessary to re-tape the body again to make sure none of the primer in the old paper releases into the paint. Then shoot the color, which is PPG Deltron base coat mixed to the original color of the car: silver/blue metallic. The color goes down in a fashion called dry. It's called this because it's better to have more layers of light coats than thick wet coats. If you get a run in the color, you've got serious trouble. Take it SLOOOOWWWWW at this point.
I laid down 4 layers in total which took about 3 hours to do very carefully. The first 3 layers were put down in a horizontal pattern and the final coat in the vertical to cover up an effect called tiger striping. I also found the lighting in my garage stinks especially in under areas around the rear window cowl and the edges along the bottom of the panels. I grabbed a flash light and used that to peer under these areas and then shoot to make sure I got good coverage. Good thing I did too since I could see very clearly that I was not getting good coverage in these areas after the 2nd coat.
Final stage comes the clear coat. For this I used PPG Concept 2021 urethane. The clear needs to be put down VERY soon after the color to avoid oxidation and discoloration of the color. The first layer of clear I put down with my HVLP gun, the same one that I shot the color with (I used a siphon gun for the primer layers). It did fine for a light tack coat of clear but had some issue shooting it when I went slightly vertical to get under the fenders. The viscosity of the clear is quite thick and I think that my cheapy HVLP gun from Harbor Freight couldn't handle it. So, I switched to the siphon gun and then laid down 2 wet layers of clear. This is what it looks when complete. Still left to do is the color sanding and cut and finish compounding steps. But this looks simply awesome and really sparkles in the light!

After final color and clear, rear deck
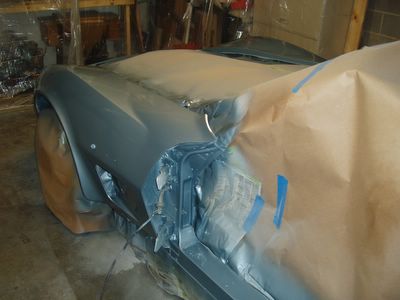
Final color and clear, drivers side
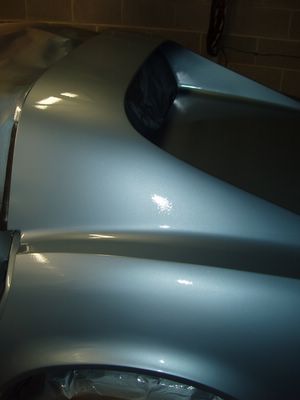
Final color and clear, drivers rear fender
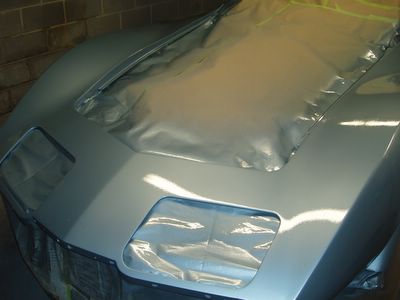
Final color and clear, front
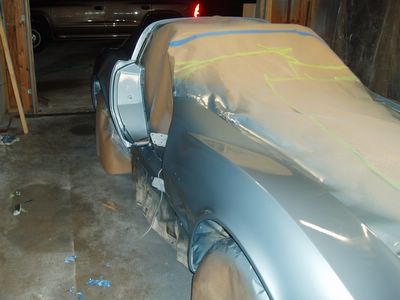
Final color and clear, passengers side
I laid down 4 layers in total which took about 3 hours to do very carefully. The first 3 layers were put down in a horizontal pattern and the final coat in the vertical to cover up an effect called tiger striping. I also found the lighting in my garage stinks especially in under areas around the rear window cowl and the edges along the bottom of the panels. I grabbed a flash light and used that to peer under these areas and then shoot to make sure I got good coverage. Good thing I did too since I could see very clearly that I was not getting good coverage in these areas after the 2nd coat.
Final stage comes the clear coat. For this I used PPG Concept 2021 urethane. The clear needs to be put down VERY soon after the color to avoid oxidation and discoloration of the color. The first layer of clear I put down with my HVLP gun, the same one that I shot the color with (I used a siphon gun for the primer layers). It did fine for a light tack coat of clear but had some issue shooting it when I went slightly vertical to get under the fenders. The viscosity of the clear is quite thick and I think that my cheapy HVLP gun from Harbor Freight couldn't handle it. So, I switched to the siphon gun and then laid down 2 wet layers of clear. This is what it looks when complete. Still left to do is the color sanding and cut and finish compounding steps. But this looks simply awesome and really sparkles in the light!

After final color and clear, rear deck


Final color and clear, drivers side


Final color and clear, drivers rear fender


Final color and clear, front


Final color and clear, passengers side

Thursday, September 29, 2005
Body prep and primer
I don't have pictures of each stage but this is the process I followed:
1) I decided to use PPG paint products and purchased them all from a local supplier, Rozars. Good people there.
2) The initial stage is to clean the entire body and get any waxes, greases, etc off the body. This is essential especially since when I did the engine work I was not careful about fluids on the body and the glass was exposed. I used a PPG product DX440 which also removes silicone based products....such as penetrating fluid!
3) Now, shoot a sealer layer to act as a barrier for anything still trapped in the glass. I used DP-40LF with the 401LF catalyst. Lay down two thick wet layers.
4) This provides an excellent attaching layer for body fill. I used Ecklers Vette body fill product for this. My understanding is that this filler has some fiber strand to match the expansion characteristics of the underlying panels. This took many successive fill, sand, fill cycles to get it perfectly smooth. I would recommend using a guide coat, which is a light splotchy contrasting layer like a black, before sanding to give a good visual stop for the sanding.
5) Next comes the sanding primer layer. For this I used PPG K36 and the first round is two very thick layers.
6) Shoot a guide coat and do an initial sand. Now in my case this is where the bead blasting creates a LOT of work. The rear deck showed this tremendously. The initial shoot of 2 coats didn't come close to covering all the pitting. It took another thick 2 coats to get all the pitting filled.
7) The intermediate primer layers are sanded with 150 grit. Last comes a final primer layer, guide coat, a light sanding with 220 grit where you just are checking for high points not taking off all the guide coat. Lastly comes a final wet sand with 600 grit where you want to take off all the guide coat. When you're done you have something smooth like glass.
8) Now, in some areas I had some sand through even with the 600 wet close to edges and stuff. I found that shooting a single coat of the DP40LF expoxy primer is a recommended practice to not only cover the exposed fiberglass from the sand through but also to act as a final barrier/sealer. So, shoot that down.
Here's some of the final priming pics where you can see the drivers side is nice and smooth now. In total the above process took me about 12 days of a lot of work on nights and weekends, probably about 40-50 hours total!
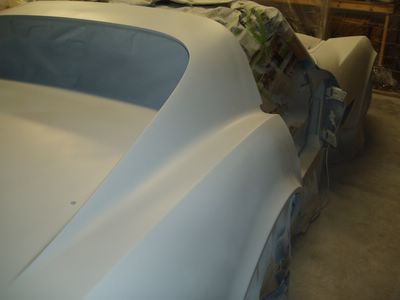
Final primer applied
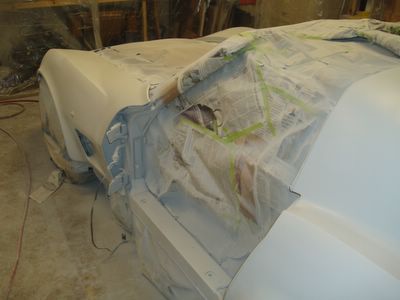
Final primer stage
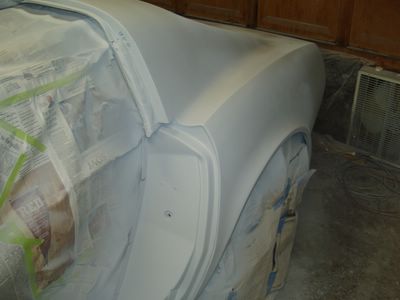
Final primer stage. Can start seeing the straightness of the panels
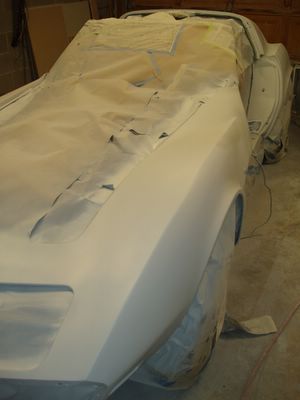
Long view of final primer. Remember how bad the front fender area looked?
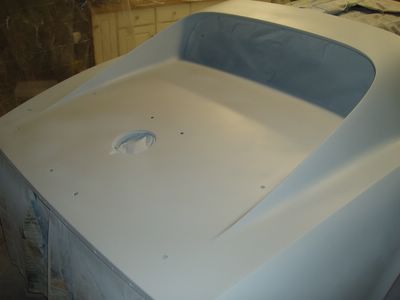
Final primer, remember how bad the rear deck was all chewed up from the bead blasting?
1) I decided to use PPG paint products and purchased them all from a local supplier, Rozars. Good people there.
2) The initial stage is to clean the entire body and get any waxes, greases, etc off the body. This is essential especially since when I did the engine work I was not careful about fluids on the body and the glass was exposed. I used a PPG product DX440 which also removes silicone based products....such as penetrating fluid!
3) Now, shoot a sealer layer to act as a barrier for anything still trapped in the glass. I used DP-40LF with the 401LF catalyst. Lay down two thick wet layers.
4) This provides an excellent attaching layer for body fill. I used Ecklers Vette body fill product for this. My understanding is that this filler has some fiber strand to match the expansion characteristics of the underlying panels. This took many successive fill, sand, fill cycles to get it perfectly smooth. I would recommend using a guide coat, which is a light splotchy contrasting layer like a black, before sanding to give a good visual stop for the sanding.
5) Next comes the sanding primer layer. For this I used PPG K36 and the first round is two very thick layers.
6) Shoot a guide coat and do an initial sand. Now in my case this is where the bead blasting creates a LOT of work. The rear deck showed this tremendously. The initial shoot of 2 coats didn't come close to covering all the pitting. It took another thick 2 coats to get all the pitting filled.
7) The intermediate primer layers are sanded with 150 grit. Last comes a final primer layer, guide coat, a light sanding with 220 grit where you just are checking for high points not taking off all the guide coat. Lastly comes a final wet sand with 600 grit where you want to take off all the guide coat. When you're done you have something smooth like glass.
8) Now, in some areas I had some sand through even with the 600 wet close to edges and stuff. I found that shooting a single coat of the DP40LF expoxy primer is a recommended practice to not only cover the exposed fiberglass from the sand through but also to act as a final barrier/sealer. So, shoot that down.
Here's some of the final priming pics where you can see the drivers side is nice and smooth now. In total the above process took me about 12 days of a lot of work on nights and weekends, probably about 40-50 hours total!

Final primer applied


Final primer stage


Final primer stage. Can start seeing the straightness of the panels


Long view of final primer. Remember how bad the front fender area looked?


Final primer, remember how bad the rear deck was all chewed up from the bead blasting?

Tuesday, September 20, 2005
Garage prep and tape off
I built a makeshift spray booth on one side of my garage. I purchased some 10 ft 2x2 stringers on about 8' centers to attached the 4 mil plastic sheeting to. You can see it along with the car rolled into the garage here:
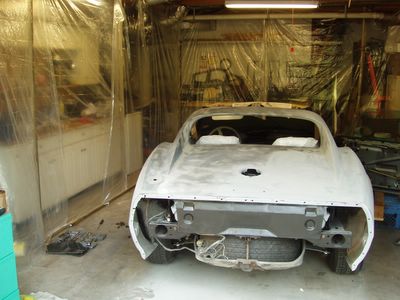
Setup a makeshift paint booth and wheeled the car in the garage.
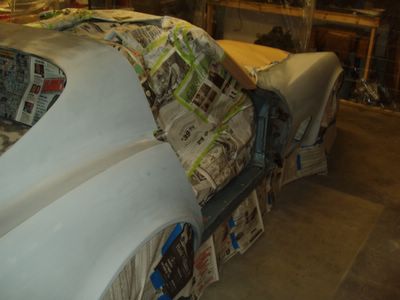
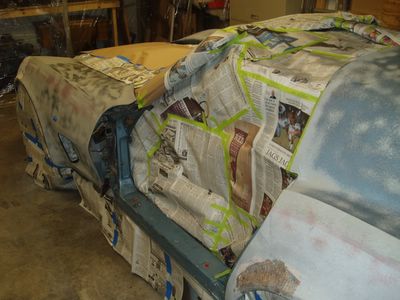
Which then moved to serious effort on taping off the body in prep for initial painting. You can see I used a bunch of newspaper which made taping off the space in the bird cage a LOT of work.
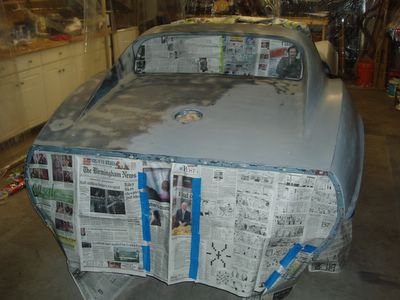
Body taped off in prep for initial painting.
More tape off
This photo shows some of the significant body work required on the drivers side. Here's the drivers side rear fender area.
More tape off
And here's the drivers side front fender area. This will need a lot of work.
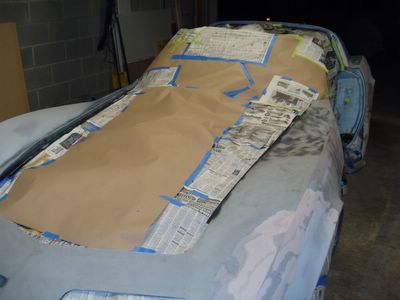
More tape off

Setup a makeshift paint booth and wheeled the car in the garage.

Which then moved to serious effort on taping off the body in prep for initial painting. You can see I used a bunch of newspaper which made taping off the space in the bird cage a LOT of work.

Body taped off in prep for initial painting.


More tape off

This photo shows some of the significant body work required on the drivers side. Here's the drivers side rear fender area.

More tape off

And here's the drivers side front fender area. This will need a lot of work.

More tape off

Sunday, September 18, 2005
Begin body work and paint
I got back from a week long trip to Austin on business and started in on the saga of painting the car. This started with removing the interior which wasn't too bad. However, the drivers side dash pad was a royal pain to remove from the gauges. With that done, the interior is out. I have all of the pieces to be replaced sitting in various boxes in the garage deliverd earlier in the year and in another recent order.
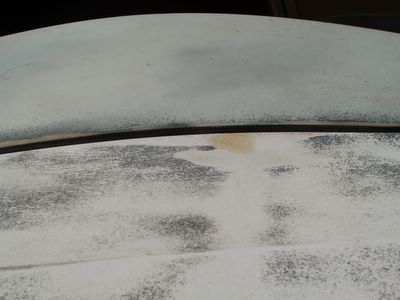
It started with needing to check a problem I already knew about, hood sag. I found that the bumpers in the drip rails had collapsed some and were not supporting the hood to the proper height. With a mock up with some wood blocks I found I could get the hood planar with the body again.
Passengers side hood sag
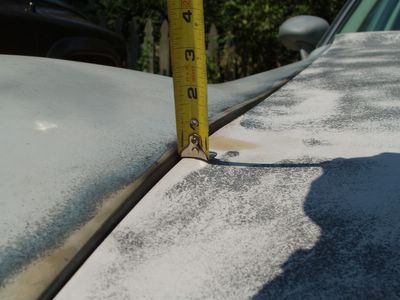
Hood sag is a good 1/4 inch. Fix this with new bumpers in the drip rails.
Here's some of the pics on the before state of the body. It was pretty bad off due to the bead blasting. This is how Jim had removed the paint and maybe it worked well for him but I would not recommend bead blasting a fiberglass body to anyone. The sruface is eroded and very pitted which means it needs a lot of work to get it smooth and straight.
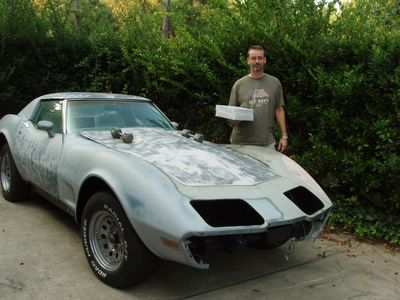
Before picture on the state of the body
I also had a passengers side door sag and planarity problem that can be seen here:
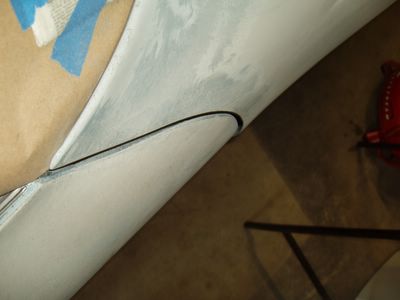
Passengers side door is not flush with the body and will need some shims to the hinge of about 1/8" before remounting.
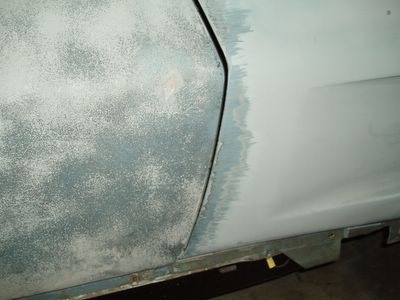
Can also see some gap variation on the passengers side door that will be fixed when remounted.
It started with needing to check a problem I already knew about, hood sag. I found that the bumpers in the drip rails had collapsed some and were not supporting the hood to the proper height. With a mock up with some wood blocks I found I could get the hood planar with the body again.

Passengers side hood sag


Hood sag is a good 1/4 inch. Fix this with new bumpers in the drip rails.

Here's some of the pics on the before state of the body. It was pretty bad off due to the bead blasting. This is how Jim had removed the paint and maybe it worked well for him but I would not recommend bead blasting a fiberglass body to anyone. The sruface is eroded and very pitted which means it needs a lot of work to get it smooth and straight.

Before picture on the state of the body

I also had a passengers side door sag and planarity problem that can be seen here:

Passengers side door is not flush with the body and will need some shims to the hinge of about 1/8" before remounting.


Can also see some gap variation on the passengers side door that will be fixed when remounted.

Tuesday, September 06, 2005
Sorry about not updating the blog!
To anyone who is reading the blog, I really apologize for not keeping up with it in the past 2 months. Work has been a real nightmare and then I had to tear down the motor to replace the wiped cam, that was a bummer! THe blog just kind of fell to the bottom of the list. I hop eto catch it up over the next few weeks with what has happened. There was a lot going on with the project. I just lost the discipline to post it here.
Woo-hoo! Up and down the street!
Today I go down and pick up 2 more gallons of trany fluid and dump in a full gallon when all was said and done. These TH350s take a LOT of fluid but it was bone stock dry due to the rebuild and new torque convertor. I think when it's all done I put close to 12 qts in the thing but now it stays at the full mark instead of drinking the stuff like a bottomless pit. OK, back to the story and the good part. I start it up, drop it into reverse and feel the trany catch. Pop into drive and we've got liftoff! Take it for a few sprints up and down the street and life's good. I tried standing on the gas but got some hesitation. Pull back in, check the timing and advance it to 14* and it's idling much better too. Try again and now I can stand on it without hesitation. It's not burning rubber but there's more tuning to do. I'm a happy camper with those items all working and checked out now. I can move onto the body work and painting.
The end of the restoration is in sight!
The end of the restoration is in sight!

