Monday, January 31, 2005

Gas tank removal

Got started on the gas tank removal from the frame last night after the body off. My tank has a steel jacket over it. I've never seen this in any of the manuals or other pictures. Curious. It's held on with bolts under the tank attached at the frame.


Fuel tank send unit connector on left hand side of gas tank. Steel line runs to vapor tank in front left. Posted by Hello


Gas tank lines on right hand of tank Posted by Hello


Gas tank overflow line underneath right rear of tank. Posted by Hello

Sunday, January 30, 2005

And then there was two.... (frame off!)

Today is the tale of two halfs.....the upper half (Body) and the lower half (Frame). The body is all prep'd at this point. Everything is built including the body dolly, the hoist frame, and the body mounts are all unbolted.

That's my brother-in-law around back. He's good to help out......but he still thinks I'm crazy!


Body coming off with hoist Posted by Hello

I decided to go the hoist route for several reasons. Where I live, most folks are not that self-motivated to do this kind of stuff let alone find 8 of them to lift this off by hand. (These crazy people will pay someone to hang a picture.....no joke!) The frame is 4x4 on the sides with a 4x6 header across the top to support the hoist. The hoist is a 2-ton unit from Harbor Freight and only $35. The 2x4s on the sides are there to stop the assembly from racking in the 3 direction: front, back, and each side.


Body coming off, side view with hoist and hoist frame. Posted by Hello


After body removal on dolly Posted by Hello


Frame after body removal Posted by Hello

Saturday, January 29, 2005

Body mount removal

One of the primary reasons for doing the Frame off resto approach is because the body mounts were toast and here's the proof. Ugly!


Left #4 body mount made an awful mess. The steel case attached to fiberglass is toast and now on the floor. Posted by Hello


The left #4 mount, totally rotted on frame and the body casing. Posted by Hello


The right #4 body mount is not as bad but enough so that the bolt head twisted off! Posted by Hello


#3 Body mount on drivers side had to be cut off with Sawz-all. The case nut broke loose from its weld. Posted by Hello

Frame/Body disconnects

The list of things to disconnect on the vehicle:

* Brake lines at the master cylinder
* The emergency brake cable under the body just behind the tranny, and the pulley
* The shifter cable to the tranny
* The speed-o cable coming from the tranny rear end to the transfer unit above the rag joint
* A few wires to the AC, distributor assemblies
* Vaccuum hoses (tag and label these, don't forget)

Friday, January 28, 2005

Body dolly assembly

Got the wood to build the body dolly. I found these plans for a C2 body dolly and was told they would work for a C3. Not quite true. A few modifications are in order:

1) Lengthen the front box to come out an additional 3 inches to catch the radiator support bracket.
2) I had to end up placding 4x4s in the 4 corners of the main box in the frame rails where the body mounts attached. Otherwise the under body fiberglass would be resting on the 4x4 ends in the corners.


C2 dolly plans. Front box needs to be about 4 inches longer for C3. Posted by Hello

Saturday, January 22, 2005

Engine compartment disassembly

One of the hardest things to do is put these things back together again. I strongly recommend getting a roll of masking tape and tag EVERYTHING that is disconnected. And take lots of pictures. This is what the engine compartment looks like before being disconnected.


Engine before tear down Posted by Hello


Throttle body cable connections to carb. Posted by Hello

Monday, January 17, 2005

Front end disassembly complete

Okey dokey. Got the AC evaporator coil, radiator, AC, and alrernator off. It's looking pretty empty up front.


Headlights, radiator, fan removed Posted by Hello


Radiator removed from front Posted by Hello

Saturday, January 15, 2005

Front end disassembly

Started the front end disassembly. There's a lot of stuff in the front end so the time to actually take it all off is about double in order to take pictures, tag with tape, and then make sure everything is set out properly.

I take pictures of anything that is remotely complicated like the underside of the headlight assemblies. This has to go back just like you see it here.


Underside of headlamp Posted by Hello

I also try to put all the bolt and nuts back on where they came from so I don't have gaggles of plastic bags with tags flying around. Here you can see 2 bolts that hold the bottom of the front bumper assembly to the vaccuum tank horn.


Behind front bumper, vaccuum tank after bumper removal Posted by Hello

Friday, January 14, 2005

Corvette America order

The parts from Corvette America for the interior arrived today! You'd think Christmas came 2 weeks late for me! Of course when this order arrived, the wife just kind of looks at me like, "You're going to owe me!"

Thursday, January 13, 2005

Got the T-top inserts

The T-top inserts arrived today. They were exactly what was advertised which is awesome. The E-bayer that I bought these from was beakybeakybeaky. I'd recommend him if you see any of his auctions.

Monday, January 10, 2005

GM rocks! Original invoice

That lead on GM providing copies of old invoices ended up being true! I just got my copy of the original invoice. It confirms everything that was originally on the car as an option. In particular I can verify the interior and exterior colors to keep them original. The interior was indeed white and the exterior was the Silver/Blue. Now that I'm paying attention to older Vettes on the road, I haven't seen any Silver/Blue. I'm not wanting to be just another "me too" look for a Vette and so the thought of Silver/Blue with white interior is starting to grow on me. Of course the wife would soon call it "Go-go boot white". It was the '70s afterall!

Thursday, January 06, 2005

Interior T-top inserts

I found an auction for some repro T-top inserts on E-bay. They are already white which is kind of unusual. So, I bid on the auction and ended up being the only one that bid at all. I ended up saving about $150 over what I would have paid from a dealer. The guy in the auction was friendly and prompt, exactly what you expect from fellow E-bayers! I should get them in the next 7-10 days.

Wednesday, January 05, 2005

Start the disassembly process

Well, decided to go the frame off route. I think I know what I'm in for.....pain!

Really, I am convinced this is the right thing to do and feel good about this resto. So, start with the back end, probably the easiest place to start. The bumper cover has 17 bolts around the body and is extremely tight. Took me like 2 hours to get all of them off. Then I took the bumper itself off. I decided to remove the bumper at the connections to the frame itself instead of at the Ener-sorbers. This way I can bolt it back on without needing a re-alignment.

Loads of Dirt Dobber nests.


Rear end after bumper removal. disconnected bumper at frame connection to avoid re-alignment during re-assembly Posted by Hello

More evaluation

I'm getting down to evaluating some of the smaller details on the interior and exterior. I'm not sure yet what to do with these things. Any ideas or comments, feel free to send them to me. I am doing this blog to benefit not just myself!

* Interior T-top panels are really in bad shape. I'm looking on E-bay to replace those possibly.
* The drivers side seat belt is badly frayed and rust stained.
* The lower right dash pad has a small nick in the vinyl. I think I can repair it.....I hope.
* Carpet has some rust tinge to it in a few spots. Clean it? Maybe.
* The door panels look sore, but the Deluxe door panel repros are enormously expensive from the major dealers at about $800 for the set! Ouch. This one needs some serious thought.
* The bumper covers have some larger gaps of separation from the main body around the corners. I'll have to see what is causing that.

Tuesday, January 04, 2005

Ordered some parts

It was pretty easy to evaluate the interior condition and know what I needed to do in several areas. So this is my first round of parts orders. I decided to go with Corvette America for this round.

* Dash pad
* Lower left dash pad
* Left and right lower kick plates
* Upper windshield trim
* T-top trim
* Dome light cover
* Plastic primer for dying
* White dye spray
* Luggage rack mount kit

On another good note, I was digging around some more in the boxes and found all the original badging for the body. This is extremely good news as I found these are VERY expensive little buggers. They need some paint work but at least I have them.

Monday, January 03, 2005

Interior pics of what needs to be done

Here are some of the pics of the interior and what needs to be done. I can either put a dash cap over this or replace it. I personally lean to just replacing it but these turkeys aren't cheap based on what I can find on the internet!


Mongo dash pad crack


Lower left dash pad crack Posted by Hello

Saturday, January 01, 2005

The evaluation

We drove back with the Vette in tow. Every stop we made people were asking about the car and commenting on how much they loved them. It gets me jammed up about doing this project.

We got it off the trailer and into the garage no problem. The engine tends to idle very low when cold which doesn't surprise me much with the amount of time it was in the garage. With the car in the garage for a couple of days I could confirm the slow leaks that I was told about from the transmission and the power steering. The transmission has never been rebuilt and does not surprise me that a gasket leak is the probable cause. The power steering leak seems to be coming from the seal of the primary piston. Either a rebuild kit or a replacement is in order.

I couldn't help myself and just had to take it out on the street in the neighborhood some on New Year's Eve. It was hilarious, I came around a corner into a cul-de-sac where some people were firing off fireworks, couldn't have been doing more than 15-20mph in a 30 mph zone, and the guy yelled at me, "Slow down!" I guess the car just looks fast.

Once the car got warmed up, the idle was now way too high, in the 1500-2000 rpm range. Some carb work is coming. But I thought I would go ahead and try a few things out. Changed the plugs. They were in pretty bad shape, fouled badly. Next morning did some laps around a 4 mile loop about 10 times to burn off some of the old gas and then stopped to put in some fresh gas and fuel cleaner. After about an hour of running it in loops, the idle is better, not perfect but still a little low. The fast idle is gone, that's good news.

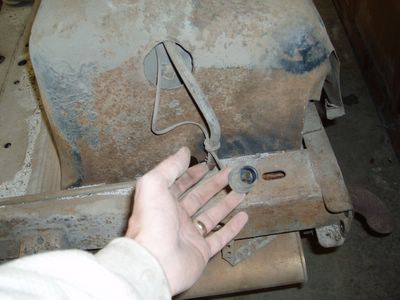
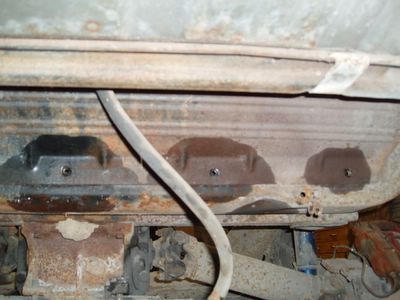
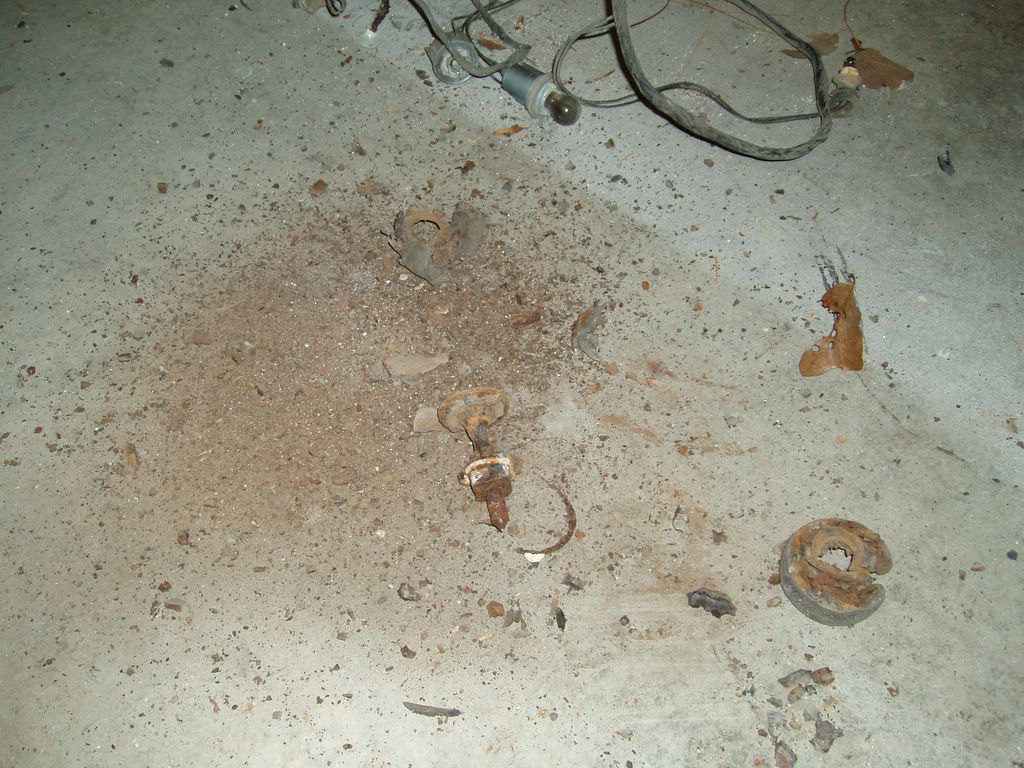
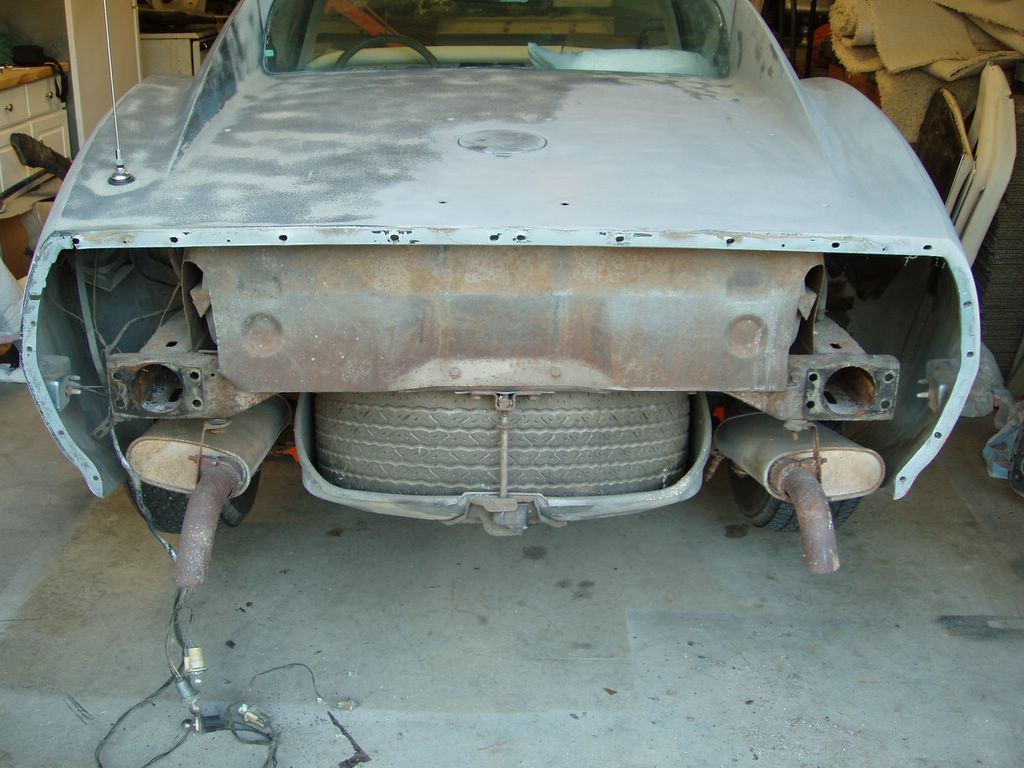
Driving it around it was obvious that the shocks were toast. Took a peak around the suspension and everything looks mechanically ok although some surface rust but in solid structural condition. The body mounts are toast, no surprise. I've already read about the issues with the rubber body mounts collecting moisture and rotting out the bolts. Goodie, goodie.

The interior is in ok shape. The dash pad has an enormous crack in the middle and the grills are rotted out. There are a few cosmetic cracks in the left lower dash pad and some cracks in a few plastic pieces. The original door panels are in rough shape, complete but showing definite wear. The carpet is in decent shape and as reported earlier, the seat covers are new.

So, with the basic evaluation completed here's the short list of things to do:

* Engine rebuild. It's got 102K on it and never rebuilt. It needs some TLC but is strong.
* Tranny rebuild
* Power steering rebuild
* AC compressor
* Dash pad
* Lower kick plates on both sides
* Upper windshield trim piece
* Door panels
* Re-seat and re-seal the front and rear windshields
* Paint and body work

The good news on a few things mechanically is that the guy I bought it from had already done these:

* Sand blasted the body
* New master cylinder and stainless calipers
* Re-cored the radiator
* Relatively new alternator

And in looking through the boxes of parts I found these things:
* Original T-top covers
* Original luggage rack
* Original owner's manual
* Original radio w/CB
* most of the rear compartment trim pieces in good shape

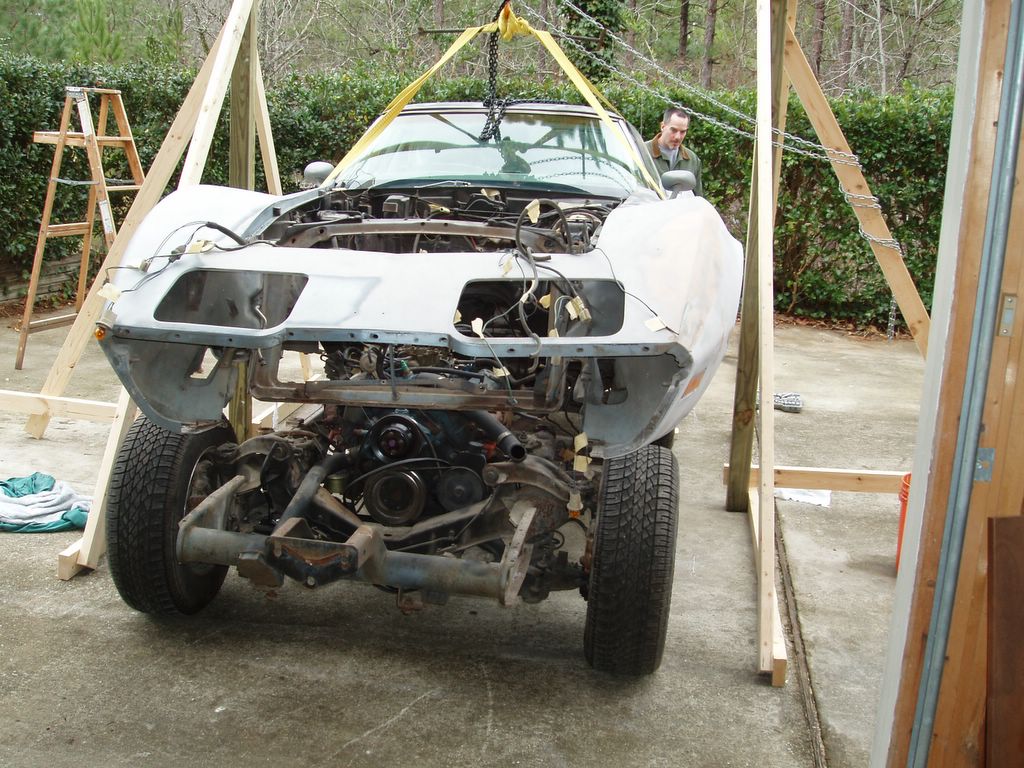
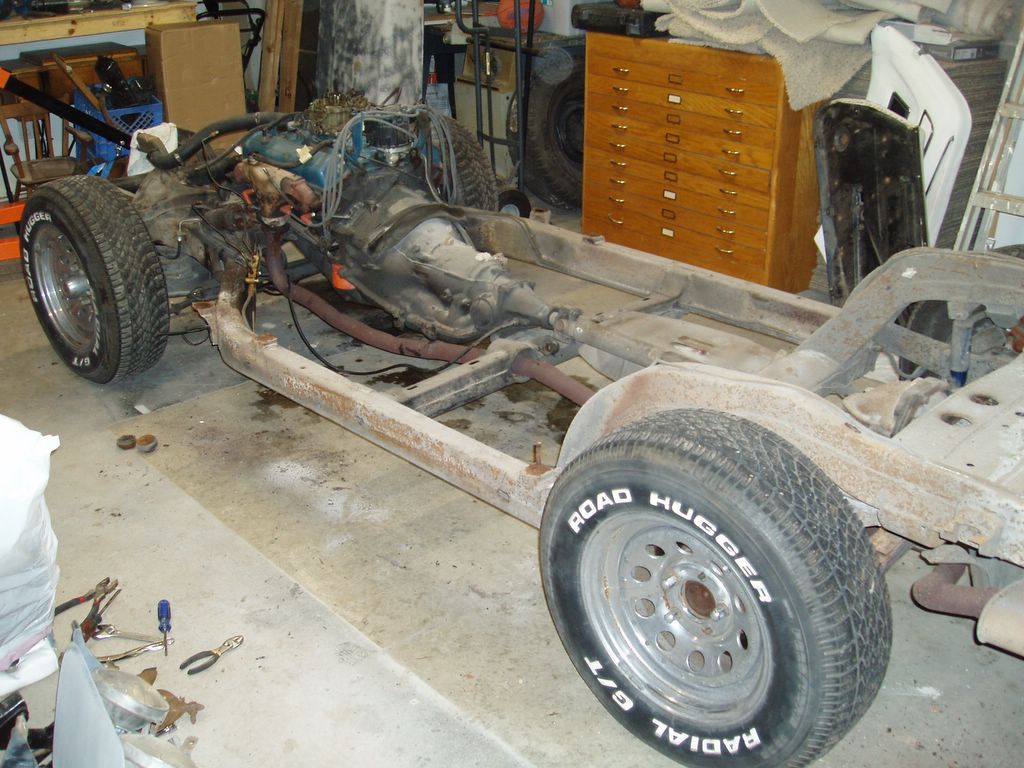
Because the body mounts are toast, I'm toying with a frame off restoration. It's a lot of work but when I'm done there will be no doubt about the condition of the vehicle. This is the direction I'm leaning. I originally had a target for completing all this by June. With a frame-off who knows but I feel in my heart this is the right thing to do.


The objectives of the project are:

* Keep the vehicle in as original condition as possible. Rebuild as much as I can and replace only what I have to.
* Possibly beef up the 2nd motor to get it near the 300 hp mark but keep the original motor and ALL other original parts replaced.