Saturday, March 26, 2005

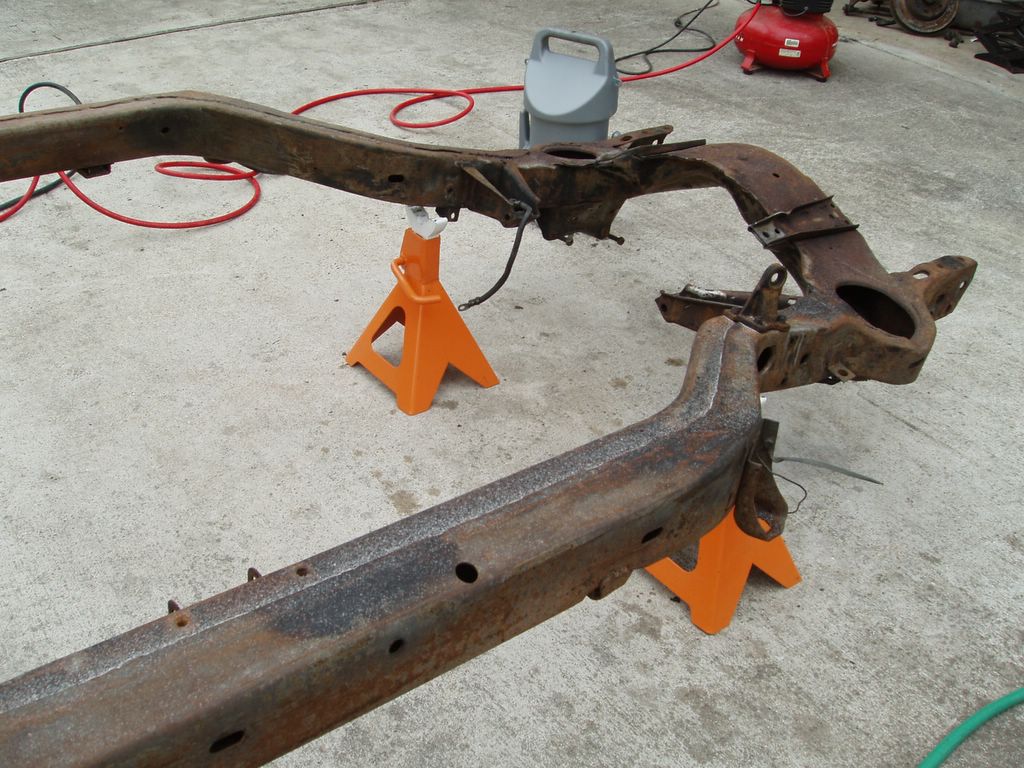
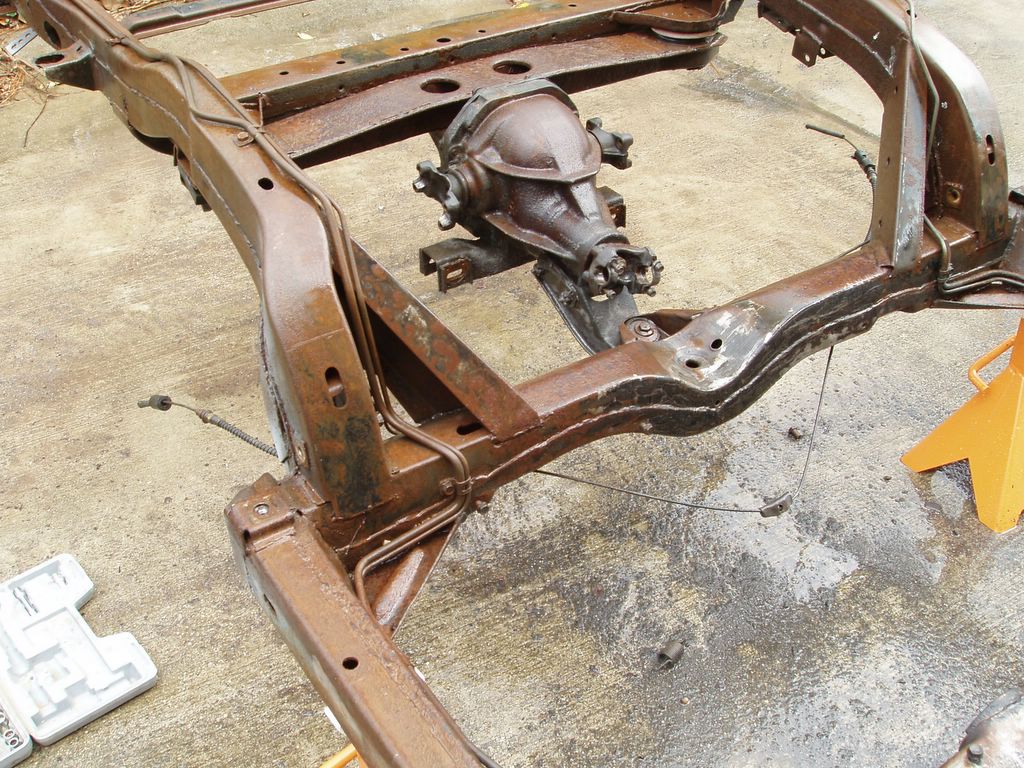
Suspension re-assembly on the frame

Saturday has turned into a gourgoues day. The weatherman had forecast thunderstorms for the day and he couldn't have been more wrong. I've got to get a job like that! Today is the day to put the front suspension back on the car. Here's some pics chronicling the effort.


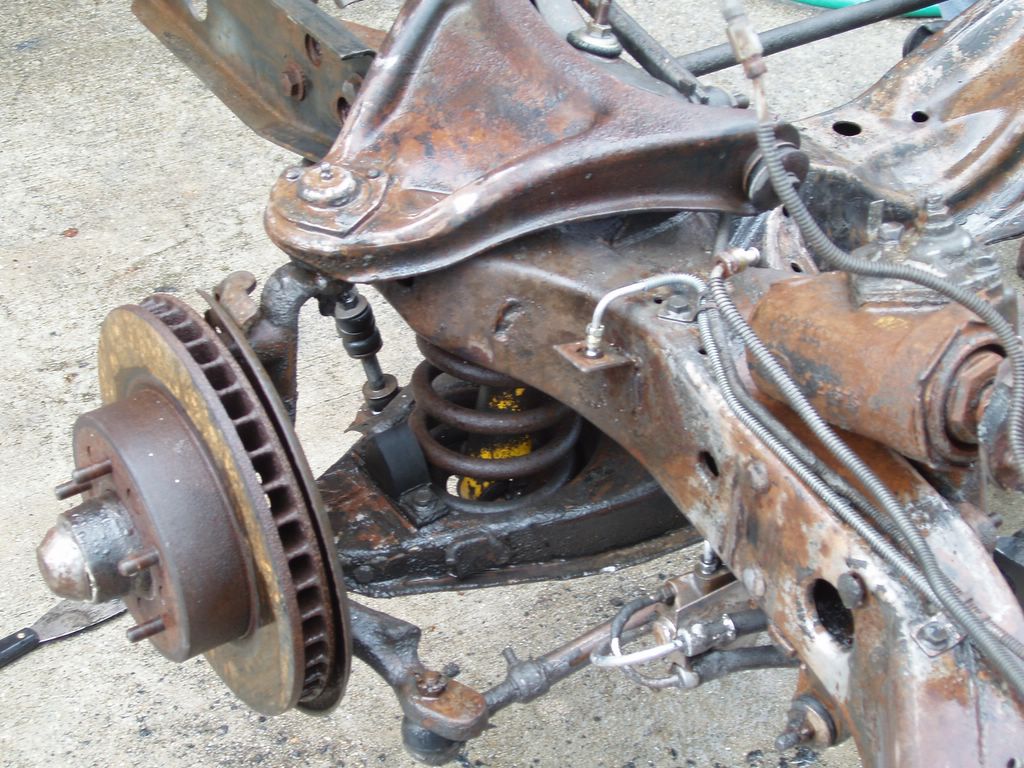
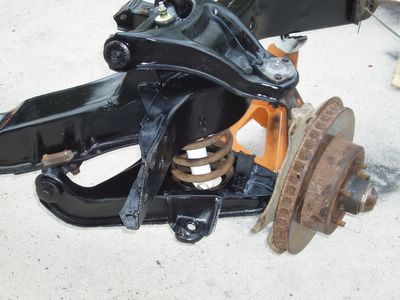
The right hand side full re-assembled.

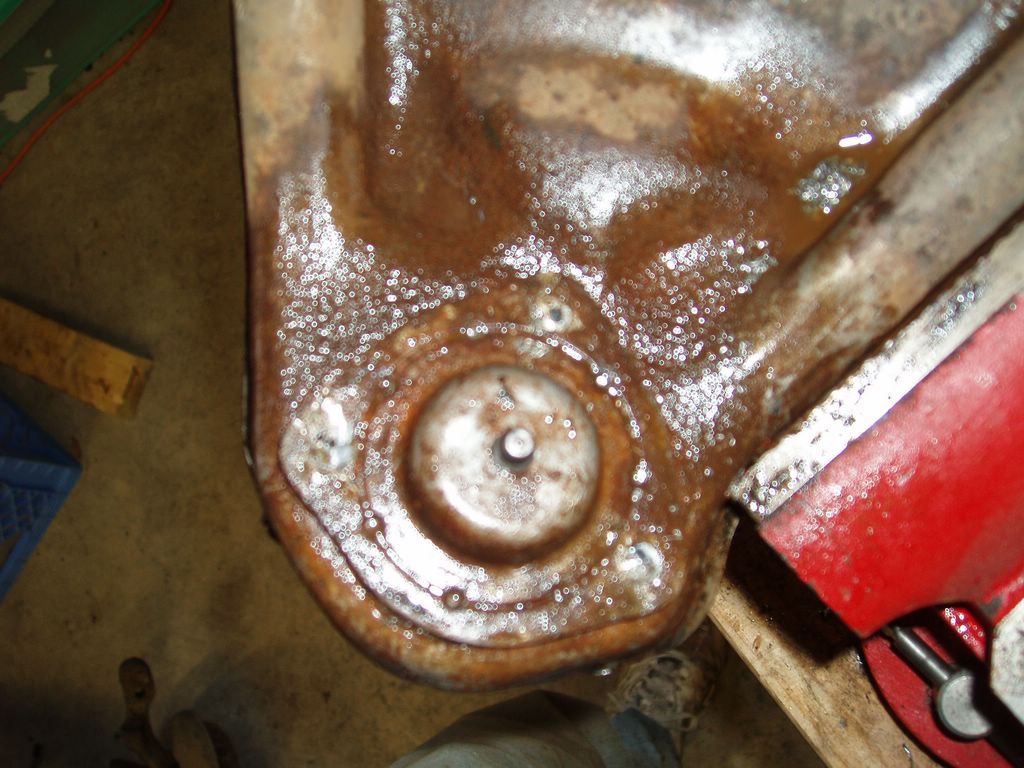
I didn't detail paint the spring or the main spindle support for a few reasons. One, these take a hard amount of abuse and two, they were'nt horrible rusted like the a-arms. Also, the rotors are spinning quite nicely and they can always be serviced while on the car in the future. If I pull the rotor then for some reason I can paint the spindle support. But something tells me in a year of road driving you wouldn't be able to tell either way.


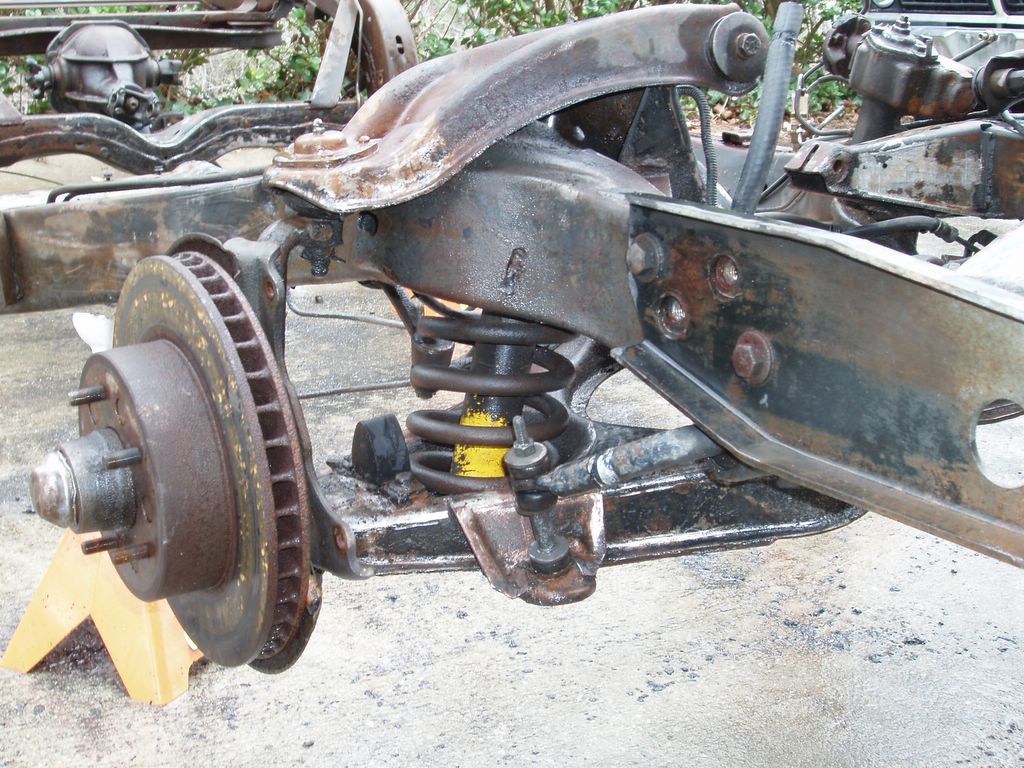
The left side re-assembled the same as the right side.


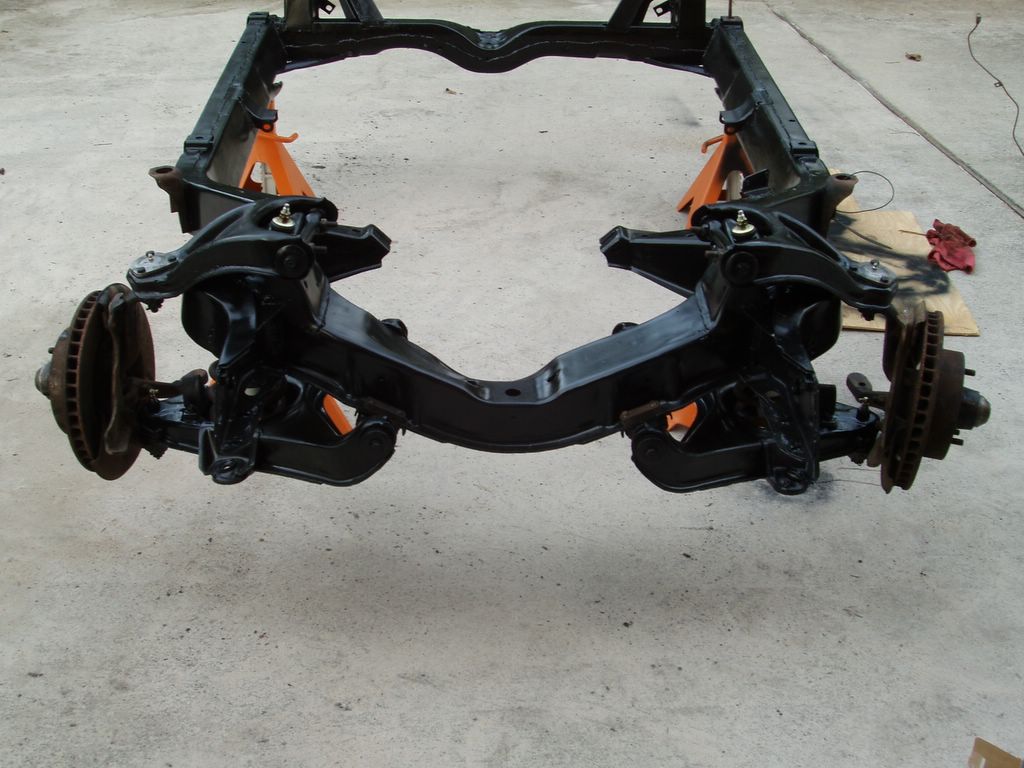
And a front picture of the whole thing. I decided to use KYB shocks because of their endurance and ride. Very non-original but in a few spots I'm doing that on purpose. I do want to enjoy driving it as much as how it looks and only an NCRS judge would shoot me for doing it.

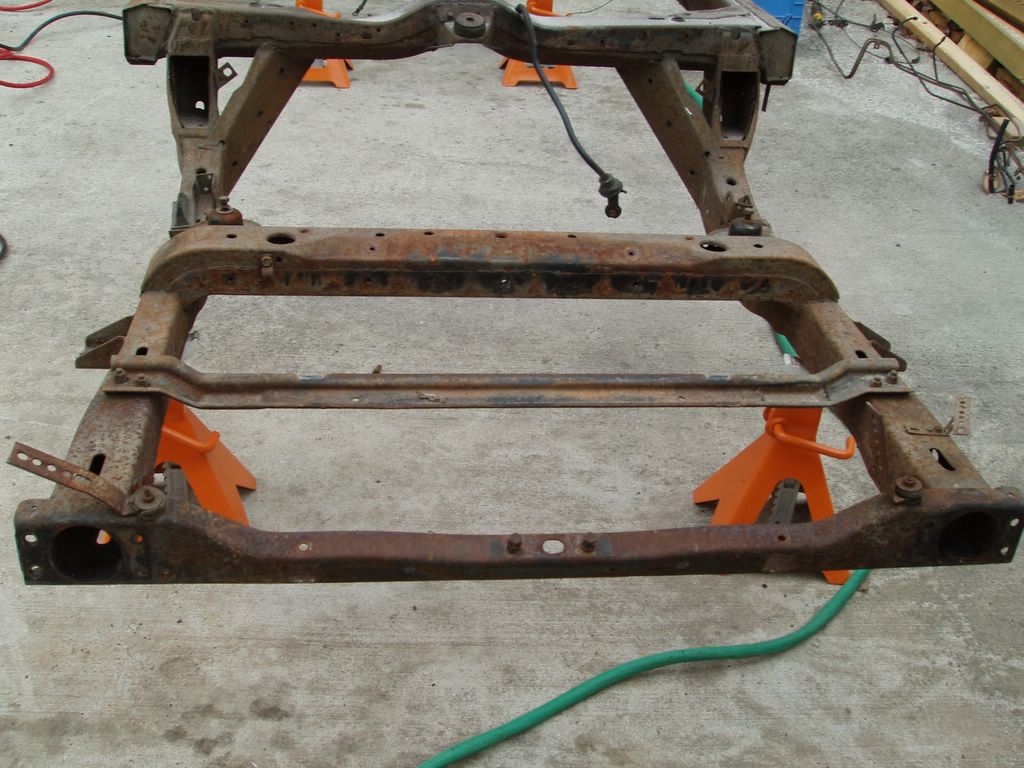
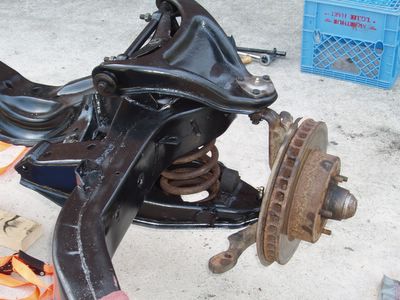
I brought the frame back into the garage now that much of the nasty sand blasting and painting stuff has been done. That and I got sun burned today doing the work outside. Spring is here at last!

Trailing arm rebuild from VanSteel

The family returned from Spring break this weekend and brought along the goodies from Van Steel. I was very pleased with the quick turnaround that they did this past week. The wife dropped them off on Tuesday and they were technically ready to pickup on Thursday. That's service! I'm very pleased with the work they did and how friendly they are.


Ahhh, the trailing arms from Van Steel arrived with the family today. Aren't they pretty!

Friday, March 25, 2005

A-arm rebuild continued

I never imagined the a-arm bushing removal and installating would be such a royal pain! First, it looks like the lower bushings have been replaced before because whoever did them buggered up the joints a bunch. That's not helping. But, I did stumble across some penetrating fluid from Gunk that has PTFE in it and it made things workable. It took a lot of hammering and vice work to get them out, but out they came. Putting them back in was just as much fun.


Left upper a-arm before tear down


Underneath the a-arm, rusty and the ball joints are toast


Drill out the rivets in the ball joints and then use a chisel to knock off the tops


Lower a-arm. The ball joints on the lowers had a lot of slop both side to side and up and down. This contributes to a loose ride and must be replaced.

So, got the right side bushings and ball joints removed and reinstalled the new ones from Bairs. I will say this about my estimation on the need to do a frame off. The play in the lower ball joints on both sides was significant including some up and down play. Not good but better now that it's done. The left side a-arms are degreased and prep'ed for the same process tomorrow.

More news on the parts front. The wife picked up the trailing arms from VanSteel today. Nothing unexpected in that job internally with the spindle. But, I knew going into the rebuild of them that the parking brake was a mess and of course the bushings were rust welded. VanSteel found that one arm was a little off of true and straightened that out. And, they also found the rotor was too thin. The rotor had been removed before because the rivets were drilled out. So, someone had turned these puppies a few too many times in the past years. Ended up with the $390 per arm job from VanSteel which is the basic rebuild plus the stainless steel rotors. I still figured that the parts on the job would have ended up at about $280 an arm if I had done them. And based on the amount of time I'm putting into just the a-arms, I would have been working on the t-arms for a veeeerrrrryyyy long time.

On the parts front, I got the parts I ordered from Zip today. That means I have everything now to complete the front suspension and steering rebuild. I ordered a power steering valve and ram rebuild kit, and new hoses since the PS was leaking before I started the rebuild. It was not a small leak either.

Goals for tomorrow:
* Finish putting together the right side suspension a-arms on the frame
* Ditto for the left side
* Re-attach the sway bar
* Do the re-build on the PS valve and ram
* Clean up the steering box

The on Sunday afternoon I can hopefully put the tie rods, PS, and the steering box all together and hook up to the suspension. I should also be able to put the rear trailing arms on but we'll have to see how that goes. I still have on the short list for the rear suspension the following:

* Crack open the diff to see how it looks and if it needs any rebuild. It's spinning pretty good and it wasn't slipping or making weird thumps on the pre-resto test drives. However, the diff is a ROYAL pain to get to once the body of a car is back on the frame and therefore deserves a solid look since I'm this far. Another case of "while I'm at it"!

* Intall the bushings in the strut rods (I got new poly bushings in this case)

* Clean the half-shafts and install the new u-joints

* Rebuild the original rear spring. This one I'm stuck. One annoying thing about Corvette Central is they always seem to have something not in stock. The spring rebuild kit I ordered was one of those things. Until it get's here I can't complete the full backend assembly.

So, those things may have to wait until next weekend to do. I've got another trip with the job out the California next week which is going to put a crimp in the progress. But, with any luck I"ll have a solid weekend again the following. My goal of a rolling chassis this weekend looks a little slim unless some stuff just flows tomorrow......not likely. But, I'd have to say it looks pretty good for the following weekend. I'm pumped up about the rolling chassis because that means getting to the motor is just around the corner. Just what every Vette freak talks about, the motor. The frame off is nice but it's the motor everyone wants to know about!

Thursday, March 24, 2005

A-arm rebuild

I got the right side a-arms bushings removed and the ball joints removed tonight. The bottom ball joint rivets were a real mess. drilled them and then beat the fool out of the ball joint until it came into submission and fell out. Then blasted and sanded the arms so they're ready for prime and paint tomorrow.

The left side a-arms got their first dip in the degrease tub and the initial scrub. I'll leave them overnight to soak some more and work the rest of the grime off. Then repeat the process for removal of the bushings and ball joints. I should be good to put the front suspension on Saturday by my estimates. Just got my shipment from Corvette Central with my shocks and body mounts as well.

Busy, busy.

Frame painting complete!

Yesterday I painted the underside of the frame. After it dried enough to handle, I flipped the frame and did the sand blasting, rust removal, and priming on the top side.

This morning is an absolutely gorgeous morning to paint a frame! Conditions are perfect. So, here's what the finished product looks like when it's done.


Top side of frame now completely prepped and painted!


A closer look now at the front cross member. This feels good to see some positive restoration progress now!


A closer look at the rear end of the frame.

In the picture below, you can see the #1 and #4 body mount brakcets are NOT painted. That's no accident. The little buggers are completely rust rotted. I have new brackets on order but they're not here yet and I want to leave the brackets on until I'm ready to weld the new ones in place so as to not lose the original location of them. So, leave them exposed for now and will finish that up once I get the brackets in.


And finally a view from the left rear. It's a nice bright sunny day and the contrast is a little tough.

Wednesday, March 23, 2005

Underside of frame after paint

I got the underside prepped and primed on Monday evening. I used POR for the priming since much of the metal was heavily rust pitted and the POR fills in the pits to give a better working surface to paint on. The POR is a liquid product that can be sprayed on but I always brush it on. The stuff is like steel after it dries and I like to be generous with it on a rusted piece of metal like this.

The weather on Tuesday was horrible, very rainy. So, I didn't get to paint the frame at all on Tuesday.

So, on Wednesday finally it's paint day! I then used a semi-gloss black enamel, Rustoleum to be exact, as the finish coat. Two coats of that. I plan on coming back with a clear coat once the entire frame it painted to add an extra hadened layer of protection.


Front underside after clean, blast, prime and paint. Much better!


Entire underside of frame after prep and paint. No more rust!

Monday, March 21, 2005

Prep and paint of the frame underside

With the family gone, I had my evening open to complete degreasing the bottom of the frame, blast, and prime the frame. Here's some of the before pics:


Underside front of frame, a few dents that I'm going to leave alone. They're not serious.


Rear underside of frame. Rusty!


Left front underside of frame. More rust! Fortunately, no rust rot!


Right front underside. You can see some of the grease pencil marks from the factory on the side rail.

Sunday, March 20, 2005

A-arm removal

Well, the good friends at corvette forum helped get me out of the a-arm removal problem. Reference this post here:

http://forums.corvetteforum.com/showthread.php?t=1042795

The trick was putting the castellated nut back on the upper ball joint to avoid it from releasing unexpectedly. Also, I tightened down the coil spring compressor a BUNCH. The whack the fool out of the ball joint with the ball joint remover and then a few whacks on the upper knuckle of the spindle assembly and within 5 whacks of the hammer, pop, it broke loose.

Then just unwind the compressor and wa-la, the lower a-arm is free and the spring comes out no problem. Rinse and repeat on the left hand side.

Thanks Corvette buddies at the forum!

Saturday, March 19, 2005

Spring removal - oh what fun!


Front right wheel, working on a-arm removal

The removal of the a-arms is turning into a real experience. I went to a local Autozone where you can "rent" a coil spring compression tool. The spring compressor hardware doesn't fit in between the coils to grab it from the top and bottom so I have to go through the bottom a-arm with the end bracket and then use a socket extender on the top bolt used to torque down the rod through the upper a-arm.

The problem is that I still can't get the upper ball joint to release and let the lower a-arm and spring to come free. I'll have to post some questions on corvetteforum.com for some help.

Frame prep day!

It's finally frame prep day! The family headed out of town on Spring Break to see the sister in Tampa and that leaves me some time to focus on the Vette for a week. I also decided to send the trailing arms to VanSteel which so happens to be in Clearwater, just south of Tampa. So, box them up with the Family and let them do the shipping for me!

Here's a bunch of pictures on the frame prep from the day.


Frame right rear


Diff still on frame


Rear of frame after de-grease and prep


Steering box, propotioning valve, and line placement before tear down


Power steering and tie rod before tear down


Power steering and gear box rear view


Left front suspension before tear down


Left front suspension from behind


From font right, sway bar, and tranny cooling line placement


Right side front fuel line, tranny line, and suspension rear view


Idler arm and right tie rod


Right suspension brake line placement


Right suspension from behind


Right suspension front view

Thursday, March 17, 2005

Shock mount removal from strut and bearing assembly problems

The t-arm bolt removal was fun. If that was fun then I'm rolling on the floor laughing with this one. The crazy shock mount that goes through the bearing assembly and the strut is rust fused to everything.....the strut, the bearing assembly, the whole enchilada.

So, I whipped out the Sawz-all and cut off the castellated nut flush with the outside of the bearing assembly. I then hammered the fool out of the end with the nut on it and made all of about 1/16" of progress in getting it out. Next, I cut the bolt on the inside edge between the strut and the right hand side in the picture below. I then banged some more, no progress. So, I went to try and cut the left hand side and discovered something I need to figure out. On the left and inside edge between the bearing arm and the strut, is that the bearing assembly steel or is that the shock bracket? Gotta find out before I cut that out.


Shock arm and strut in trailing arm - rust welded


Left trailing arm cavity. Slight rust rot on right hand inside edge


Right hand trailing arm and cavity. Same rust rot on inside edge of cavity


Side view of LH trailing arm. Wife making fun of my work!

Tuesday, March 15, 2005

Back with a vengence

The past 4 weeks have been frustrating for this project. Hey, the job pays the bills but it's wrecking havoc on my restoration! :-)

FINALLY got to do some work on the car in the past few days. The trailing arm removal turned out to be a MAJOR issue. Once the castellated nuts were removed from the bolt that goes through the frame and the t-arm, the things just would not budge out of the bushing. The rust has welded them to the inside of the t-arm bushing. So, had to get a 9" Sazw-all blade and but the buggers out.

First, remove the shims in the t-arm cavity inside the frame. There is a cotter pin that goes through the frame and the shims, remove that. Then work on the shims with some penetrating oil and work them back and forth until them come out. This will expose the screw shaft on each side to cut them with the Sawz-all. Also, make sure to remove the parking brake wire from the assembly. Once the screws are cut, they just drop right out.

There is some rust along the inside edge that is showing a little rot. I think I can clean that up, hit it with some POR when I get to that point without having any major frame repair but it will take some more looking once I get to that point.

I've been researching the rebuild of the t-arms. In particular the rebuild requires some specialized tools: spindle knock out/set tool, bearing press, and a mic to check run out when re-installing the spindle to get the shimming correct for the spindle to rotor. So, when I take a tally of the parts and tools to do the job this is what I come up with:

Trailing arm bushing - $21 x 2 = $42
Bearings and seals - $42 x 2 = $84
Spindle shim kit = $29
Miscellaneous spindle small parts kit = $26
Parking brake rebuild kit = $78 (covers 2 wheels)
-----------------------------
Sum total of parts = $259

and then if you need the tools for spindle removal, insertion, and runout mic, etc that's another $190 from the dude on Ebay for a total of $449.

Van Steel standard rebuild service - $300 per arm x 2 = $600 total

So, for $150 more I also get them stripped and painted and a 5 year warranty on the work. When I add it up, it spells no-brainer doing a complete side by side comparison. Looks like I'm using VanSteel for the rebuild of the t-arms and while they're out (about a 2 week total round trip), I'll focus on the front end suspension tear down and rebuild.

I have to take an inventory of suspension parts to order this week. The end is in sight to complete stripping the frame and then work my way back up out of the pit putting it all together again.