Thursday, April 28, 2005

Motor parts - cam decision

Real action on the motor! Got the heads from Summit on Tuesday. I didn't order the cam immediately because I wanted to pick up the motor and do some calculations on CR and then I also had to make a decision about my torque convertor. The stall speed of the torque convertor is a factor since the more muscular the motor the more the lower stall of the stock convertor can ruin the whole thing. So, I found that Jegs has a nice re-build torque convertor that ups the stall to 2200-2400 rpm and the price is right, $89!

Next, decision time on the cam. I spoke at length with Bob from Comp Cams about what I wanted out of my motor and after bouncing between the XE262 and XE268 I decided to go with the XE268 for the extra lift that it bring which helps on the top end of the rpm band. The 262 would have added about 5ft/lb more toruqe at the low end but I wanted the extra lift for the future top end without having to change the cam. One of the guys from Corvette Forum was kind enough to run Desktop Dyno on my setup and this is what he came up with:

xe268 w/headers
344HP@5000RPM 406TQ@3500RPM

xe268 w/manifolds
309HP@5000RPM 383TQ@3500RPM

xe262 w/headers
323HP@4500&5000RPM 410TQ@3500RPM

xe262 w/manifolds
293HP@4500RPM 386TQ@3500RPM

I'm running with headers as well. So the top simulation is what I should be expecting. Not bad for a $1700 motor! I especially like the torque numbers since that will really make it move snappily under normal road driving.

Summit again had the best deal on the Comp Cams kit with cam and lifters. Ordered and should be in on Friday. Also ordered from Flowtech ceramic coated headers while I was at it and the oil pan gasket and timing cover gaskets. As an aside, I found an auction on Ebay for a complete chrome dress up kit including the air cleaner, timing cover, valve covers, dip stick, wing bolts, timing mark and a few other little things. The bid started off at $27 and I'm currently in at $34. So here's hoping I win! It's a good price.

Monday, April 25, 2005

Masterbilt motor exchange

Spent some time this past weekend doing some compression ratio (CR) calculations based on the heads, gasket, etc. and flat top pistons are going to be a stretch with 93 octane pump gas. The calculation I come in with a 0.030 bore is about 9.6 which is near the top end before detonation with 93 octane. So, off to the engine builder with that info in hand.

Their opinion with the chamber volume of the heads, the over bore, etc was pretty much as I had expected....it's close with flat top pistons and no detonation issues. He also had a motor built up with dished pistons and that's what I finally went with, a 10cc dish to drop the CR just enough to give me some wiggle room. This will sacrifice a little power but I can always make up for it with a little thinner gasket in the future. A Fel-Pro 0.015" steel shim gasket would take me back to about 9.4 CR vs the 9.1 CR I calculate now.

So, $400 and I have an instant re-man engine with a warranty. Can't beat that considering the cost of machining and parts would be that if not a little more for me to do it myself to the original block.

Sunday, April 24, 2005

Rolling chassis! Joy! Joy!

I haven't made any posts to the blog in the last week because I've been intent on getting the wheels on the ground. The weekend before I set out a pretty aggressive list of things to do to achieve a rolling chassis. I got held up at pressing in the new u-joints in the half shafts. I found that the new snap rings just didn't want to seat very well and figured it was a result of the rust and crud build up in the snap ring groves of the shaft ends. So, Monday I purchased a Black and Decker "Dremel" like tool and used the cutting disk to clean out the snap ring grooves. With that done, the snap rings popped right in place and all was good.

Next, torqued down the shafts to the t-arm spindles on the back. Mounted the t-arms to the frame with the hardware from Bairs and loose fitted them, no shimming yet. Next, connect up the strut rods to the bracket under the diff. And here's where I encountered my second snag, the shock brackets didn't want to drive all the way into the spindle ears no matter how much torquing down I did. The grooved knuckle on the inside edge of the bracket was too big to seat into the ears on the spindle. Whipped out the Dremel and sanded them down a little and did a little clean sanding on the inside of the ears since the spindle was litely painted at Van Steel. Popped them back in and then they torqued down just fine. Popped in the shafts into the diff ends and torqued down the u-joint brackets. Hook up the shocks and it's coming along.

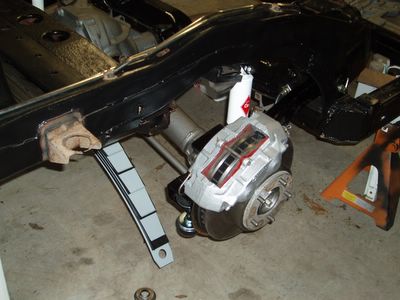
I then focused on the brake calipers. The back ones were in decent shape, a little rusted but not too nasty. I think these are the ones that Jim or Travis had replaced a couple years back. The front ones were pretty rough looking. I cleaned them all up and then inspected the caliper seals, etc. The back were in good shape, no leaks, cracks, nothing. The front weren't as lucky. The seals around the SS inserts were cracked and leaking and were extremely spongey indicating the springs were gone. Goodie, so I have to replace a couple of front calipers. Did some checking and as luck would actually have it, I found the local Autozone had rebuilt Delco calipers for $61 a piece with core exchange. This beat Corvette Central by about $28 per caliper.....real money! Finished up the prep and paint of the calipers with the VHT high heat silver and they look pretty good don't ya think?
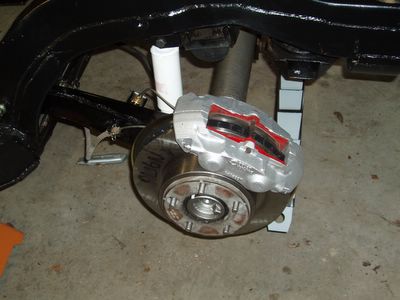

Left rear t-arm, caliper, shock all put together. Looks good! Posted by Hello


Right rear. Posted by Hello

Of course the brake lines are all new as well. The old ones were in pretty rough shape, rusty!

Saturday arrives and there's still a lot to do to get 4 wheels on the ground! Did some easy things first: put new SS alignment shims in the front matching the originals, greased up all the joints, and put in the cotter pins. Good! Now put the wheels back on. In a couple of the pictures you may notice the rear spring is on but no connected yet. I found that the weight of the car was too light to jack up the spring and compress enough to get it on the bolt. So I thought the wheel weight might be enough to do it. Wrong! The father-in-law came up with a good idea, put a beam from the frame up to the ceiling joist in the garage. What a great idea! I'm just embarassed that me, the engineer, didn't think of it. Hooked up the spring about 15 minutes later on both ends!

Here's the remaining pictures of the efforts and the reward: a rolling chassis. I've included a couple of before pictures to show the contrast.
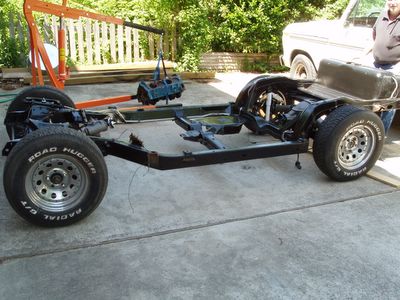


A beautiful Spring day and a rolling chassis! What a good day! Posted by Hello


This is the same thing BEFORE the restoration. Loads of work but worth it I do believe. Posted by Hello


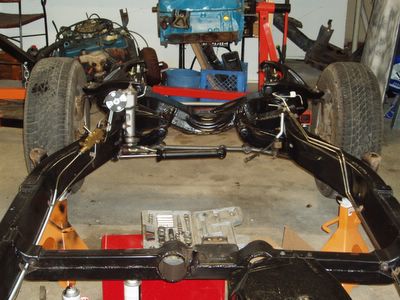
View of the front, all put together Posted by Hello
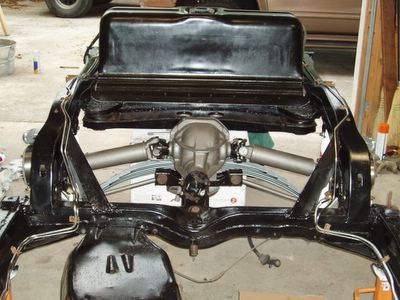

View of the back all assembled Posted by Hello
Friday, April 22, 2005

Engine build up

Tomorrow I plan to complete the rolling chassis which means I've got to get to making some decisions about the engine build up. Here's what I've decided to do:

Summits SUM-152123 heads: 67cc chamber, heart shaped, 165cc intake runner, 2.02/1.6 valves $324 a piece fully assembled
Comp Cams Magnum Roller tip rockers 1.52:1
Fel-Pro 0.041 thick head gasket

I'll take my original core and exchange it with Masterbilt motors locally next week. The details on that are the same as before.

I went with the decision for the Summit heads because the Vortecs just required too many other things to make it all pull together: the intake, the valve covers (which aren't cheap! at about $100 a pair), machining, etc. It was just too much to make it all work like I wanted it to. I've heard good things about the Summit's as they are basically a house branded version of the Dart Iron Eagle heads which are good heads by all accounts.

Friday, April 15, 2005

New lines, steering and diff

Slowly working at knocking a few things out each evening this week. On Tuesday I got the front main steering system re-installed. This involved mounting the tie rods and the main steering linkage to each other. The brake and fuel lines showed up from Van Steel as well. I had forgotten about re-painting the catalytic convertor cover that attaches just under the passenger side of the center frame. So I removed the rust from that and primed it.

Then last night I got the new diff fluid in the diff. Spins very nicely as you would expect. When you do this don't forget the positraction additive. I ended up having to get a rebuilt slave steering cylinder because the original was too Bubba'd to hold any pressure. Fortunately my local NAPA had one in stock....which was a first for this project. The better part of the evening was spent laying down the new brake and fuel lines. This is not as easy as you'd think. I even kept the original lines handy so I would know exactly how they looked put together again and it still took me close to 2 hours to do. Because of the shipping there had to be a "shipping bend" put in 3 of the 4 main lines which took figuring out which way to un-bend it to get it back the way it was supposed to be.

Then this morning, the wife made her contribution to the restoration. I needed a 3rd hand to hand screw in the 4 main bolts that attach the diff to the cross support member. She was gracious enough to screw them in while I held it up. She almost broke a sweat! :-) Next thing you know she's going to think it's HER car! That's what happened with a Mercedes C240 I had a couple of years ago. "Oh honey, you deserve it. It's your car". This was after driving a Toyota Tercel back and forth to work 26 miles each way and NO AC for the last 5 years of that! Well, 6 months into it, I had to beat her off with a stick just to be able to drive it a couple times a week! As I like to say, that little story was for free! ;-)

Plans for this weekend:

* get the u-joints replaced in the half shafts
* mount the t-arms, half shafts, shocks, struts, and rear spring for a complete backend
* clean and paint the brake calipers, attach the flex lines
* put the tires on and officially have a rolling chassis!

I've got to find someone that can weld for me. I've decided to NOT try to teach myself to weld to replace the body mounts. Hopefully I can find someone reasonable that can come to me.

I also have to make up my mind on the motor. I know what I want to do but I keep going back and forth on the heads. Summit has a nice set of heads, SUM-15123, that are self branded versions of some Dart Iron Eagle heads that have put out good dyno numbers and are about $650/pair. The we have the tried and true Vortecs with modified spring for extra lift and loads of dyno data and real experience. I can get a package from Scoggin-Dickey that comes modified, gaskets, new Edelbrock intake, and stamped steel rockers for $900. At this point, the better economic choice is the Vortec head kit considering it has the rockers, gaskets, intake and bolts as part of the package. The gaskets, rockers, and bolts alone would cost me an extra $200 over the $650 which leaves the intake at parity between the two options. The engine builder that is local that I will get the short block from has several mid 70's 350 blocks on hand for $400 which is a complete re-man short block with new bearings, rings, pistons, and a complete bore and grind of the crank. The $400 is with a core exchange but at that I'd be hard pressed to get my existing block machined and then buy the pistons, rings, and bearings for that price.

The motor break down then looks something like this:

* Short block: $400
* oil pump and pan: about $75
* head kit: $900
* cam kit: $150

I plan on re-using the Q-jet carb and HEI dist from the original motor. That's going to put me at about $1500 for the motor. Not bad on the whole and should be able to lay down some rubber when done!

Sunday, April 10, 2005

More progress

Now that life is kind of "normal", whatever that is but to means that I am home rather than on the road travelling, I've had some time to knock a few more things off the list:

* Front sway bar stripped painted and re-attached with the front suspension re-build kit from Bairs, sway bar linkages.

* Steering box stripped and painted and installed. Man, that Cast Blast paint is amazing stuff!

* New steering coupling installed (rag joint)

* Differential stripped and painted. I drained the old diff fluid and I need to put new fluid in before install.

* Rear strut rods stripped, re-straightened, painted and new bushing pressed in. The rods when they came off had a mild bend in them probably from some Bubba fixing a camber problem the hard way....bend the rods. So I heated them with the blow torch to make them easy to bend back and a few hammer throws later, straight as an arrow.

* Rebuild the PS control valve with the kit from Corvette America. This needed to be done because the PS was leaking and I wasn't sure which was leaking the valve or the cylinder.

* Which brings me to rebuilding the PS cylinder. When I got into this bugger, the last seal was missing and the end was a little buggered up where the main seal seats. I'm going to try and install the rebuild kit but I may be replacing this if it starts leaking again.

* Installed the new PS hose kit.

So, now the front steering is ready to be bolted back on. Once I get the diff fluid in I can mount that and then the t-arms, shocks, strut rods and rear spring. I ordered brake and fuel lines from Van Steel earlier in the week. Once they get here then I'll put those down, install the brake calipers and then I can put the wheels back on and wa-la a rolling chassis! Hopefully sometime this week or this weekend I'll have 4 wheels on the ground again!

Then the real fun, the motor...... Ahhh, at last.

Tuesday, April 05, 2005

Rear spring rebuild

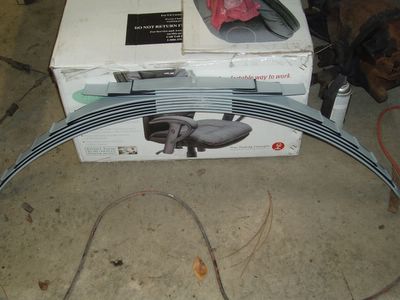
Here's some before and after on the rear spring. I decided to restore the original spring instead of replacing it at this point. A rear spring restoration kit from Corvette Central was $34 and included the paint, center bolt and nut (correct style), and the leaf inserts. Cheaper than a new mono-leaf spring and keeps it original.


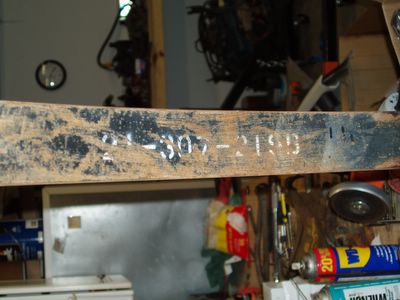
Serial number on bottom of rear spring before refurb.

As you can see from above, the spring was obnoxiously rusted. It's under the car and takes a pounding from the elements. Whipped out the angle grinding and took all the rust off to bare shiny steel and then painted it with the stuff from the reso kit.


Rear spring after rebuild

Sunday, April 03, 2005

More sand blasting and painting

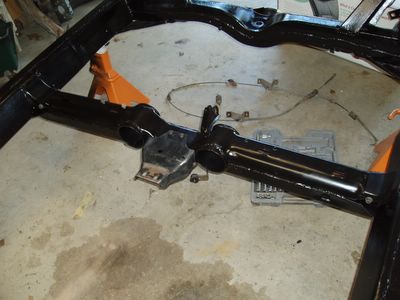
On Saturday I was back from the trip and a little beat. I still had some pieces of the frame that needed hanlding: the tranny cross member and the diff cross member. So, cleaned those up and painted them.


Tranny cross member finished

Since I was on a roll sand blasting and painting I thought I would go ahead and do the gas tank and the metal jacket that covers the tank. Here you can see the tank all pretty and mounted to the frame with the new straps. A picture of the jacket later when I get the fuel lines and put it all back together.

It feels really good to see meaningful progress on the restoration.


Gas tank repainted